Description of the Process
Research and Analysis
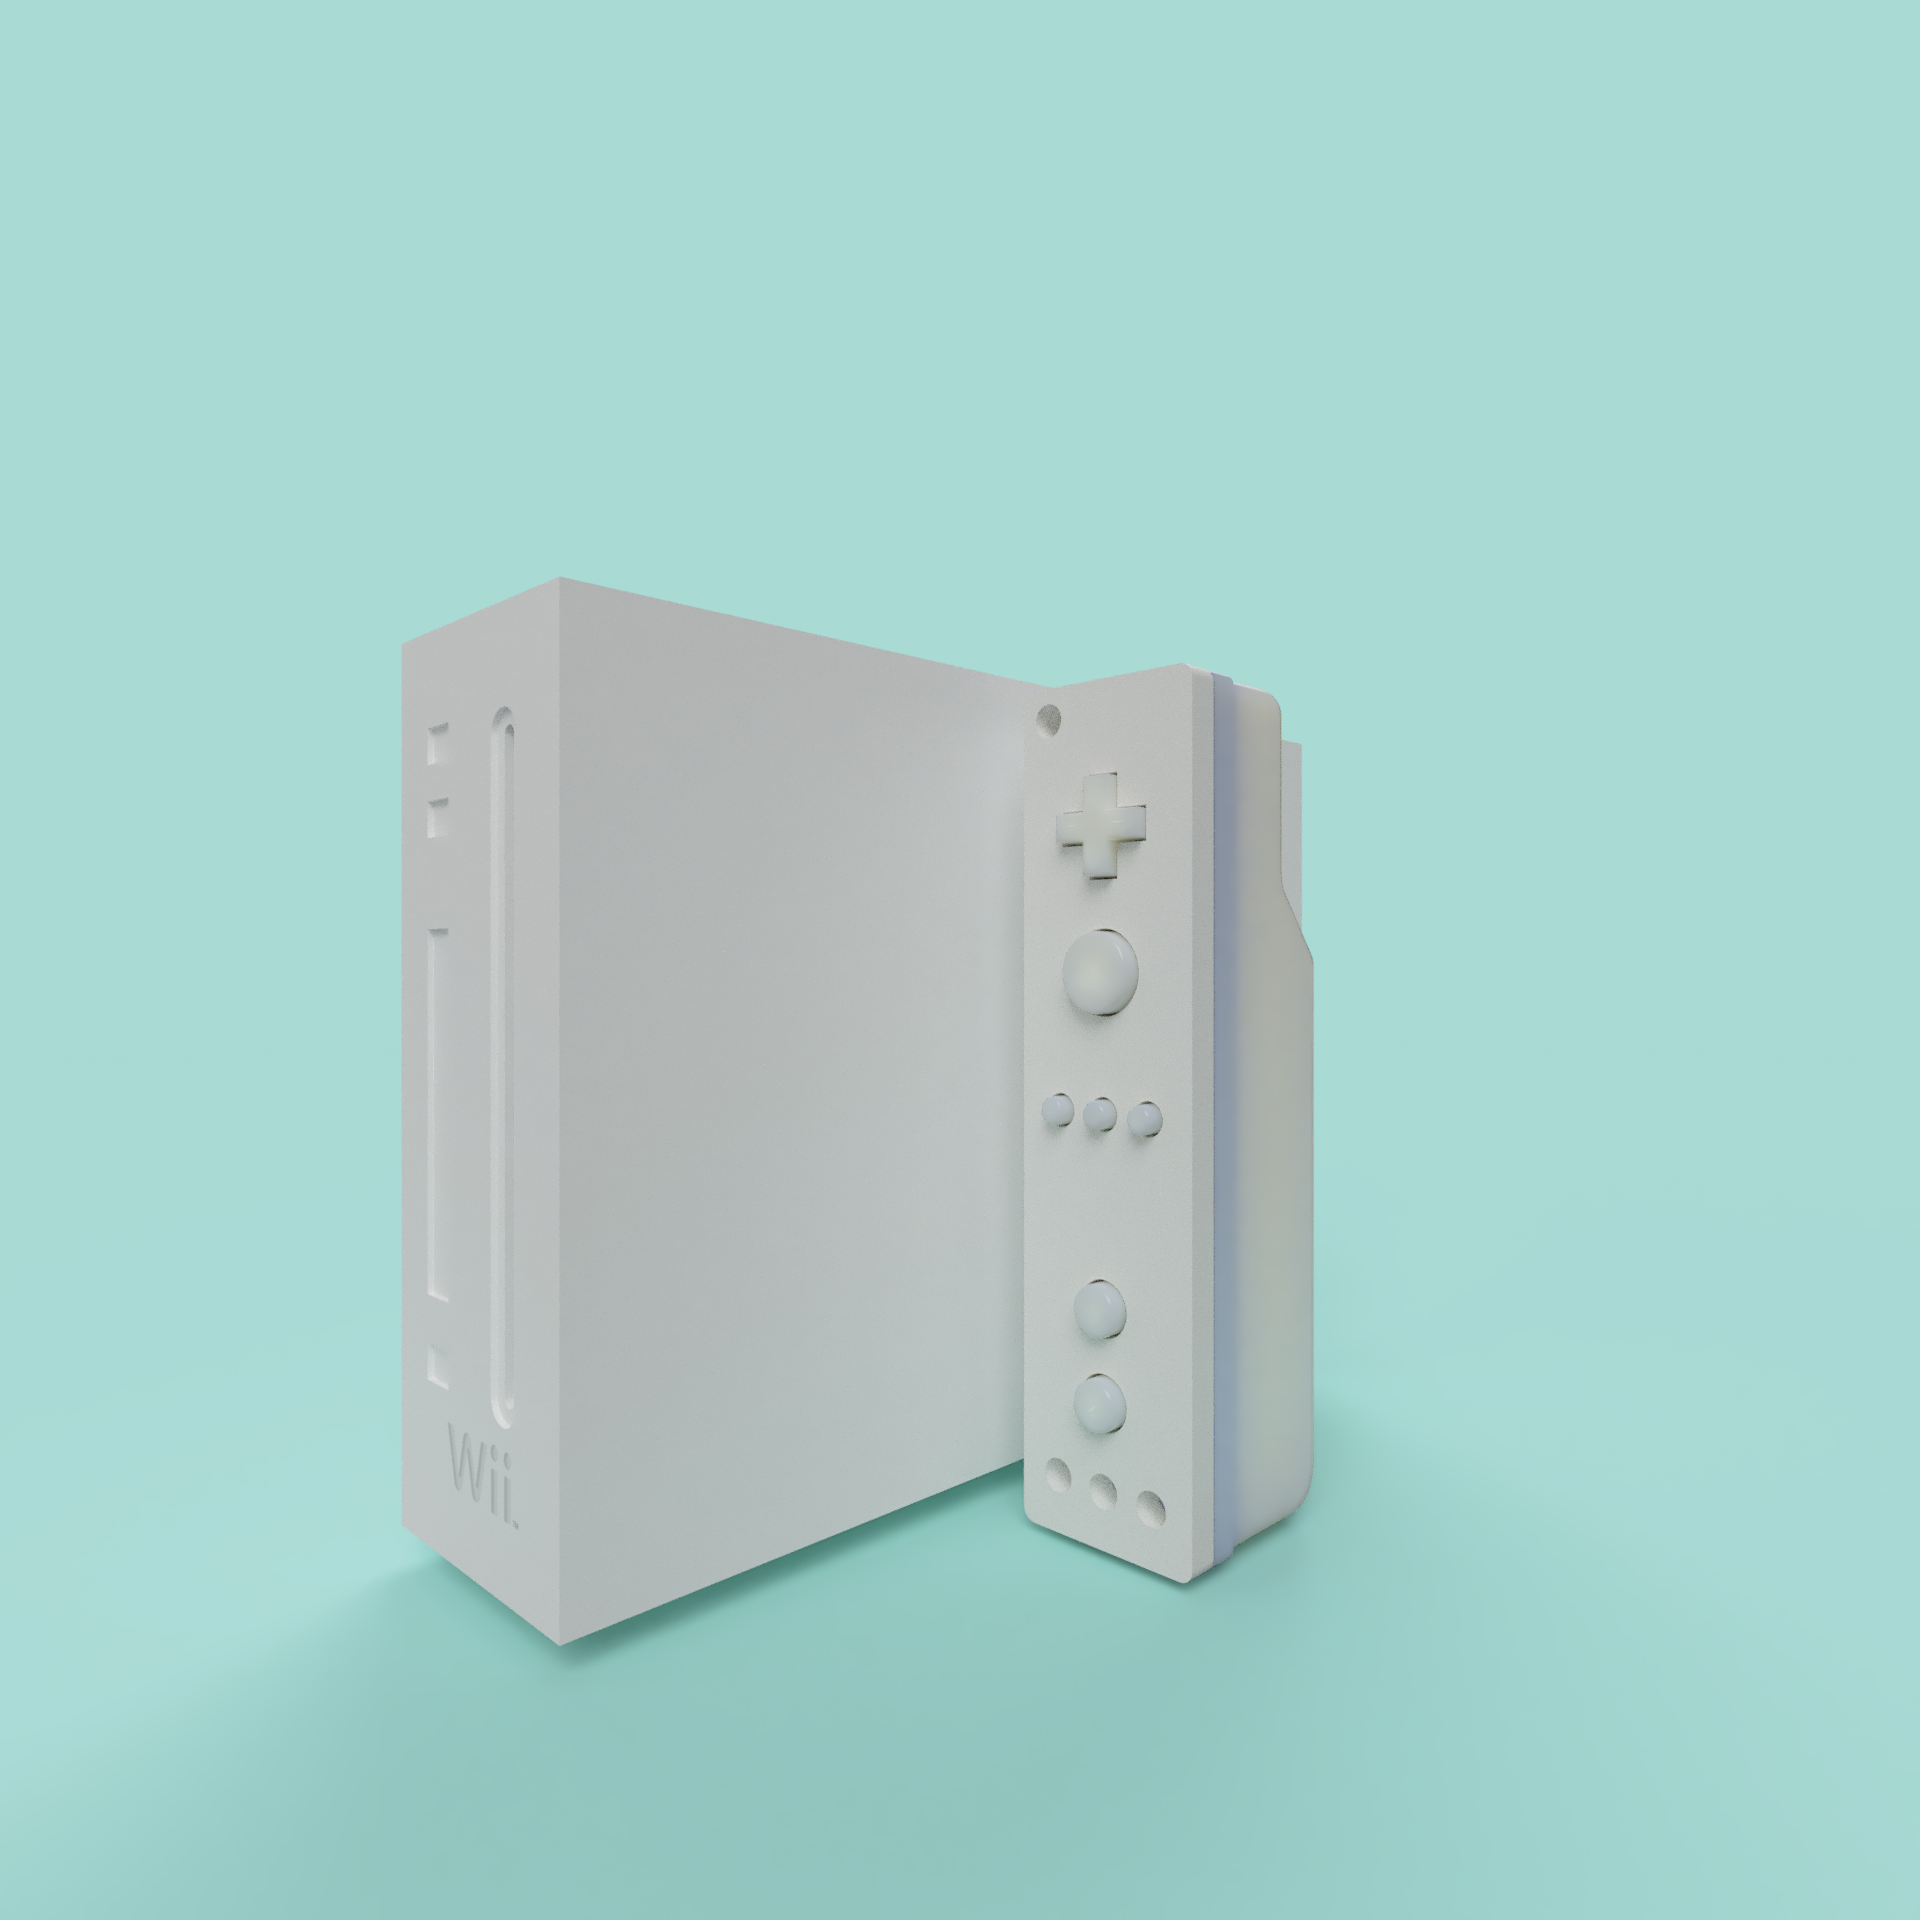
The first step in creating the prototype was thorough research of the original Nintendo Wii. We analyzed the console's physical dimensions, design features, and the layout of its various components. Detailed blueprints and high-resolution images were used to understand the structural aspects, such as the placement of ports, buttons, and the disc slot.
Modeling in Fusion 360
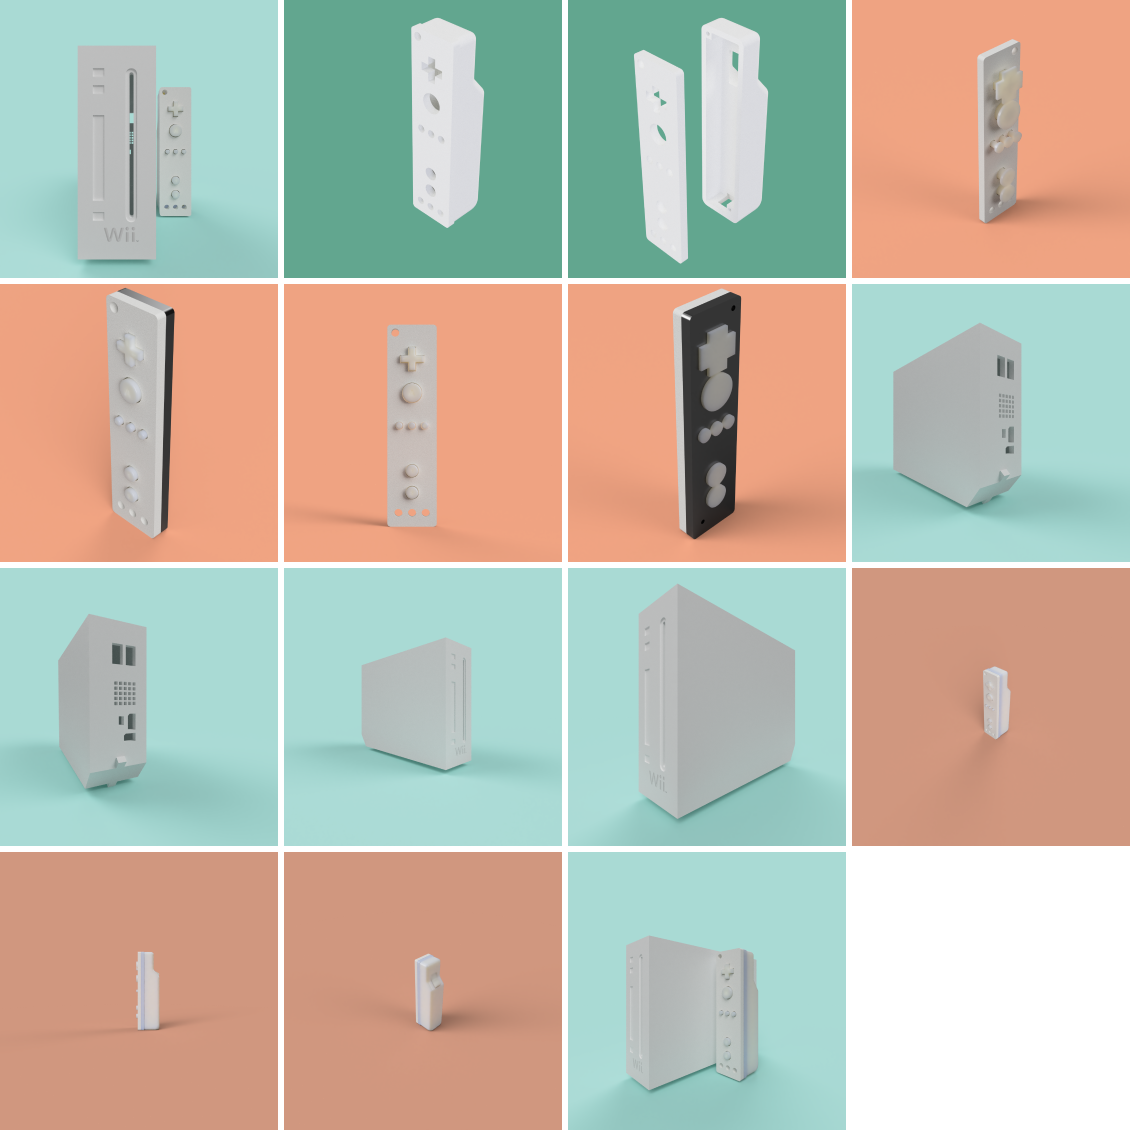
Using the data gathered, we moved on to Fusion 360 to create a detailed 3D model of the Wii. The process included:
- Sketching: We started with 2D sketches, outlining the basic shape and key features of the console. This involved defining the height, width, and depth of the Wii.
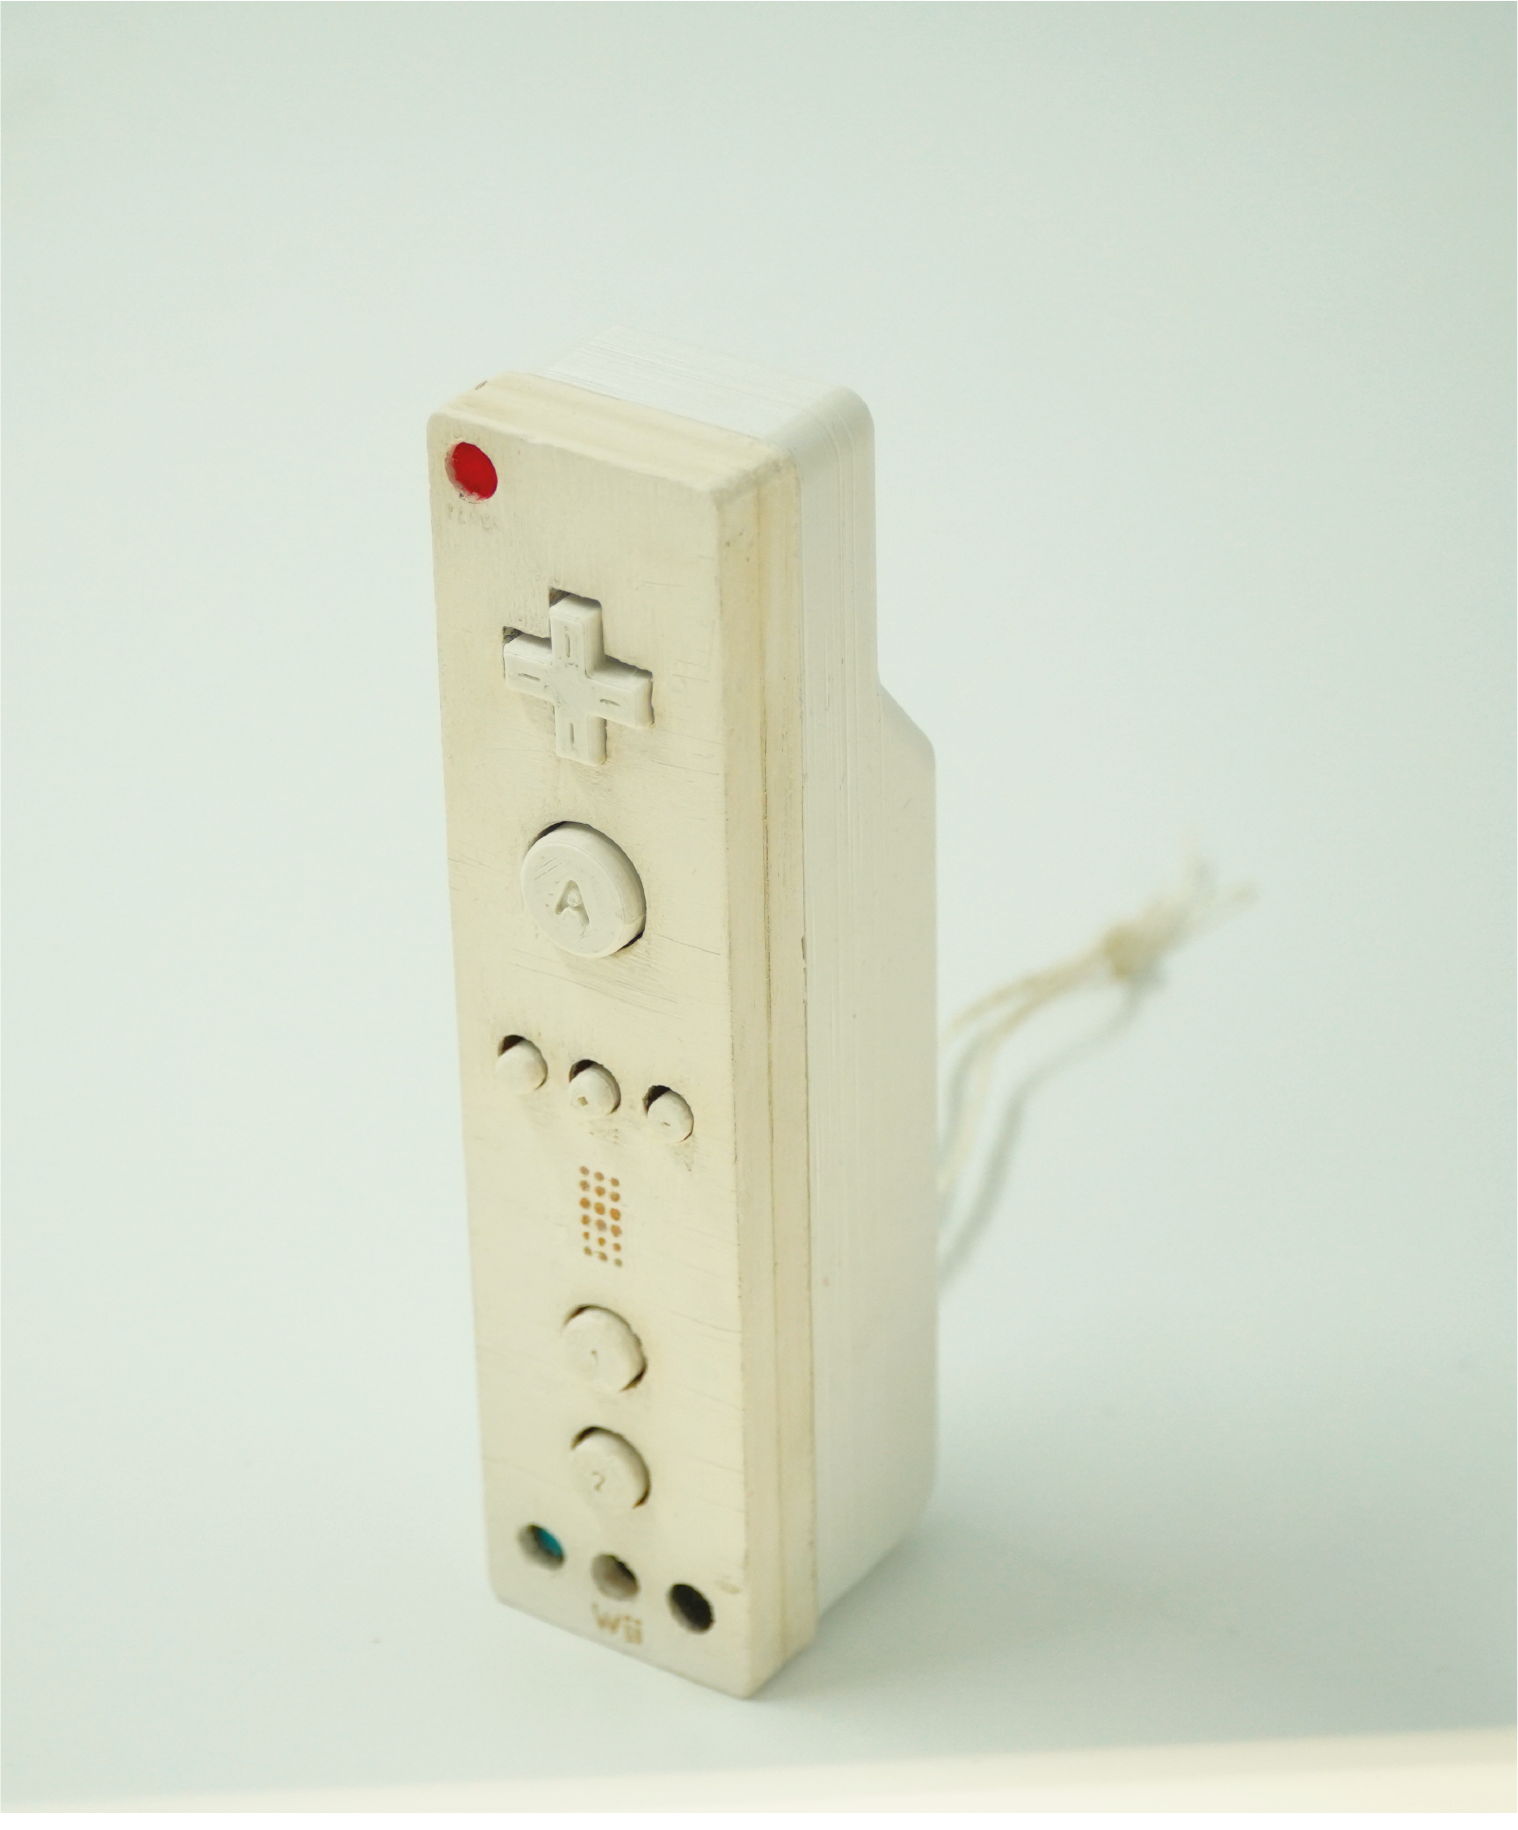
- Extrusion and Solid Modeling: The 2D sketches were then extruded to create 3D shapes. Key elements such as the main body, disc slot, buttons, and vents were modeled as individual components.
- Detailing: Fine details like the texturing on the console's surface, the alignment of the buttons, and the curvature of the edges were added. Precise measurements ensured that each part matched the original console as closely as possible.
- Assembly: Finally, all the individual components were assembled into a single model, ensuring that they fit together accurately and mirrored the real Wii's assembly.
Fabrication
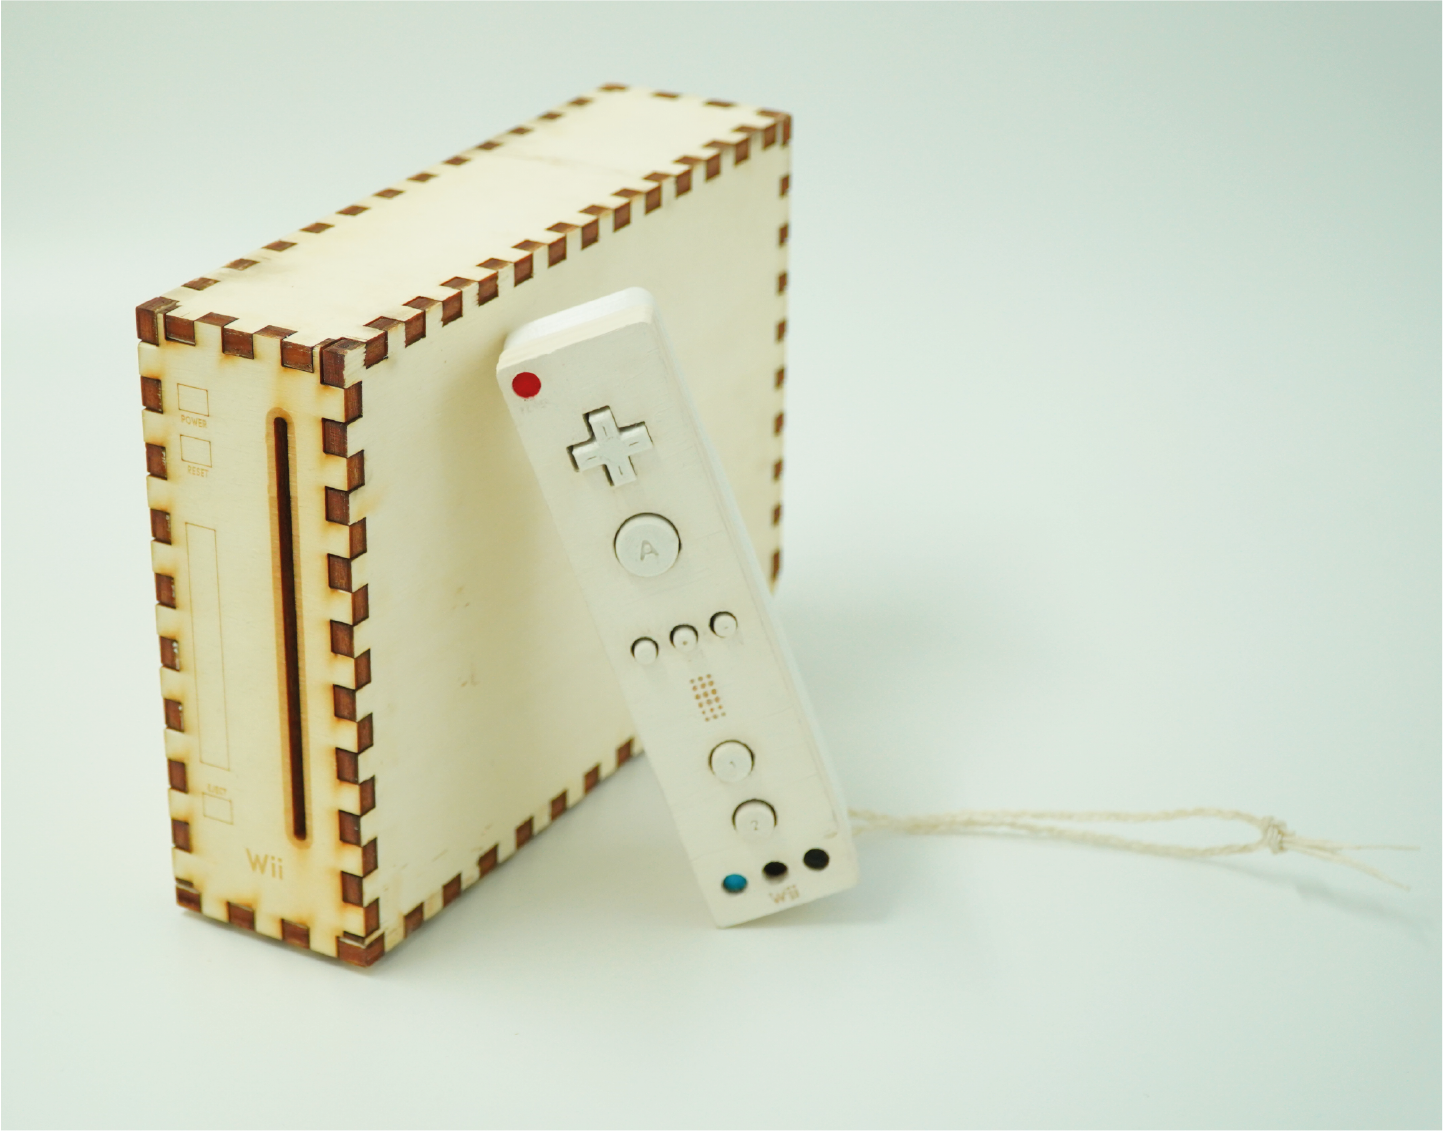
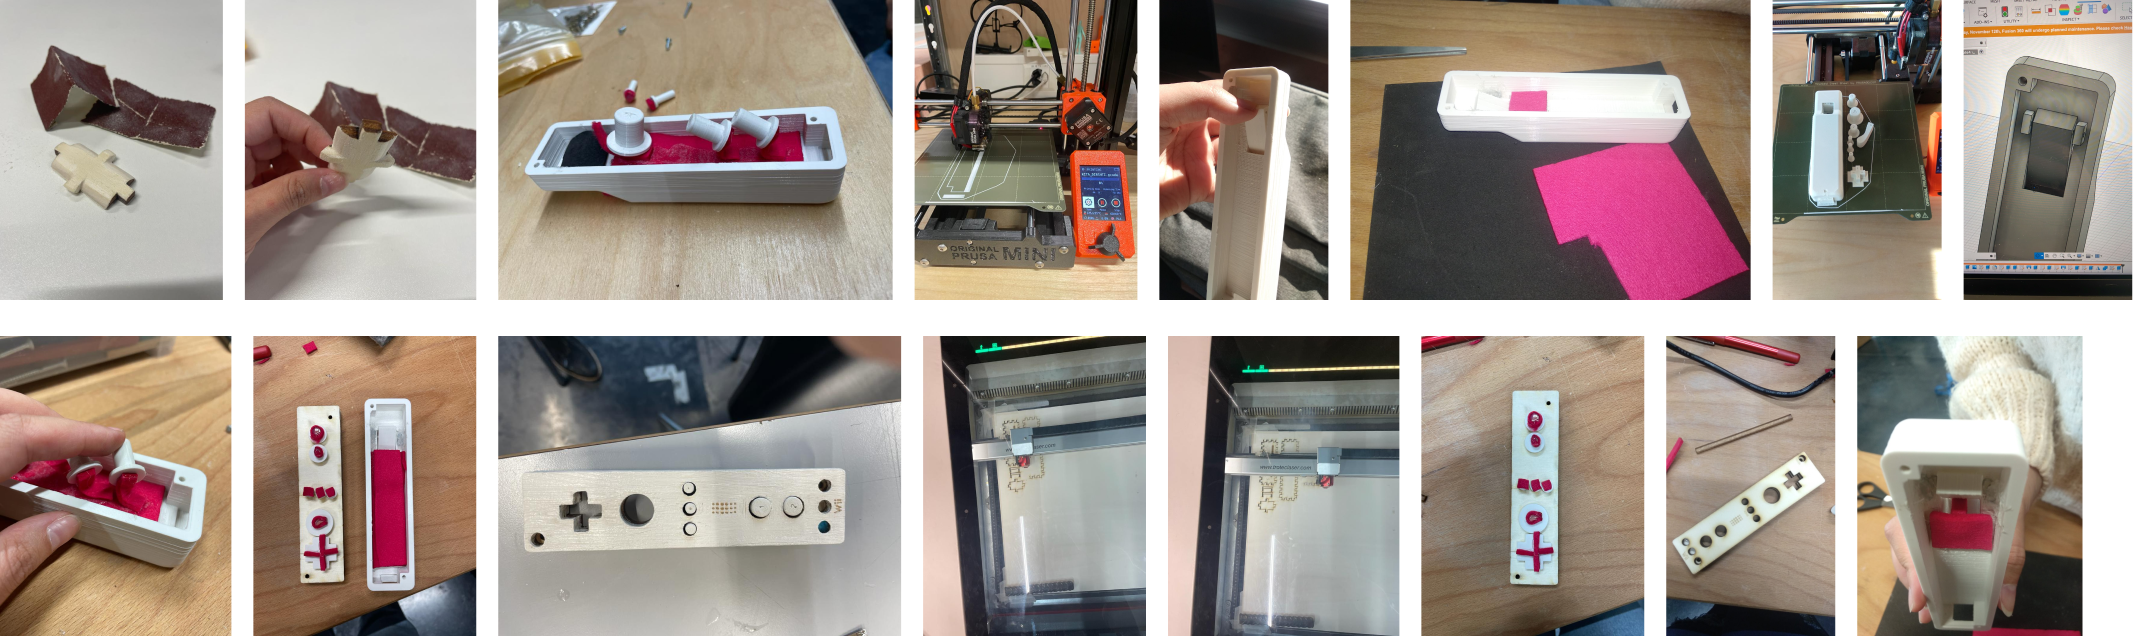
With the 3D model complete, the next phase was physical fabrication using laser cutting and 3D printing.
- 3D Printing:
- Body and Components: The main body of the Wii and other larger components were 3D printed. We used a high-resolution 3D printer to ensure fine details were captured.
- Post-Processing: After printing, parts were cleaned and sanded to remove any support material and smooth out surfaces.
- Laser Cutting:
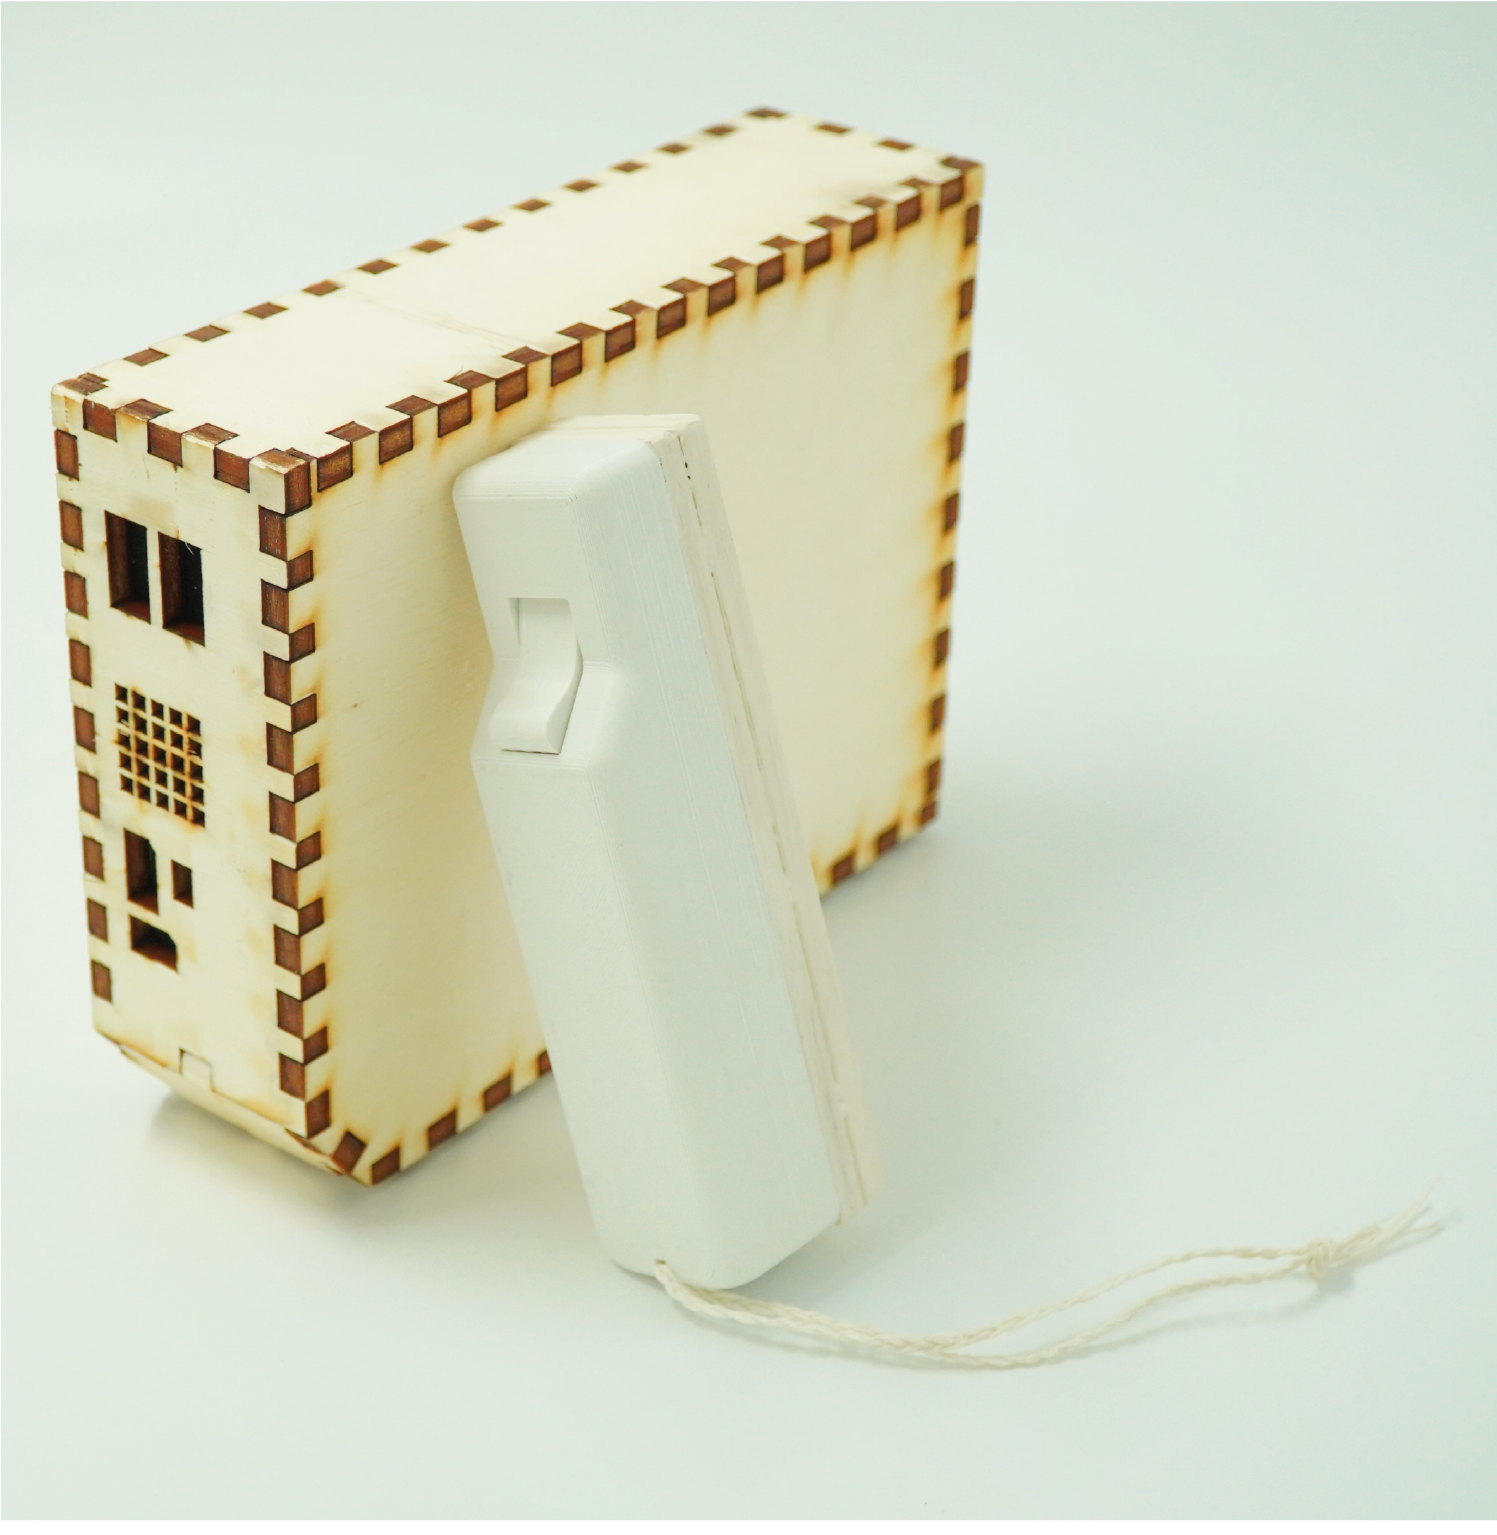
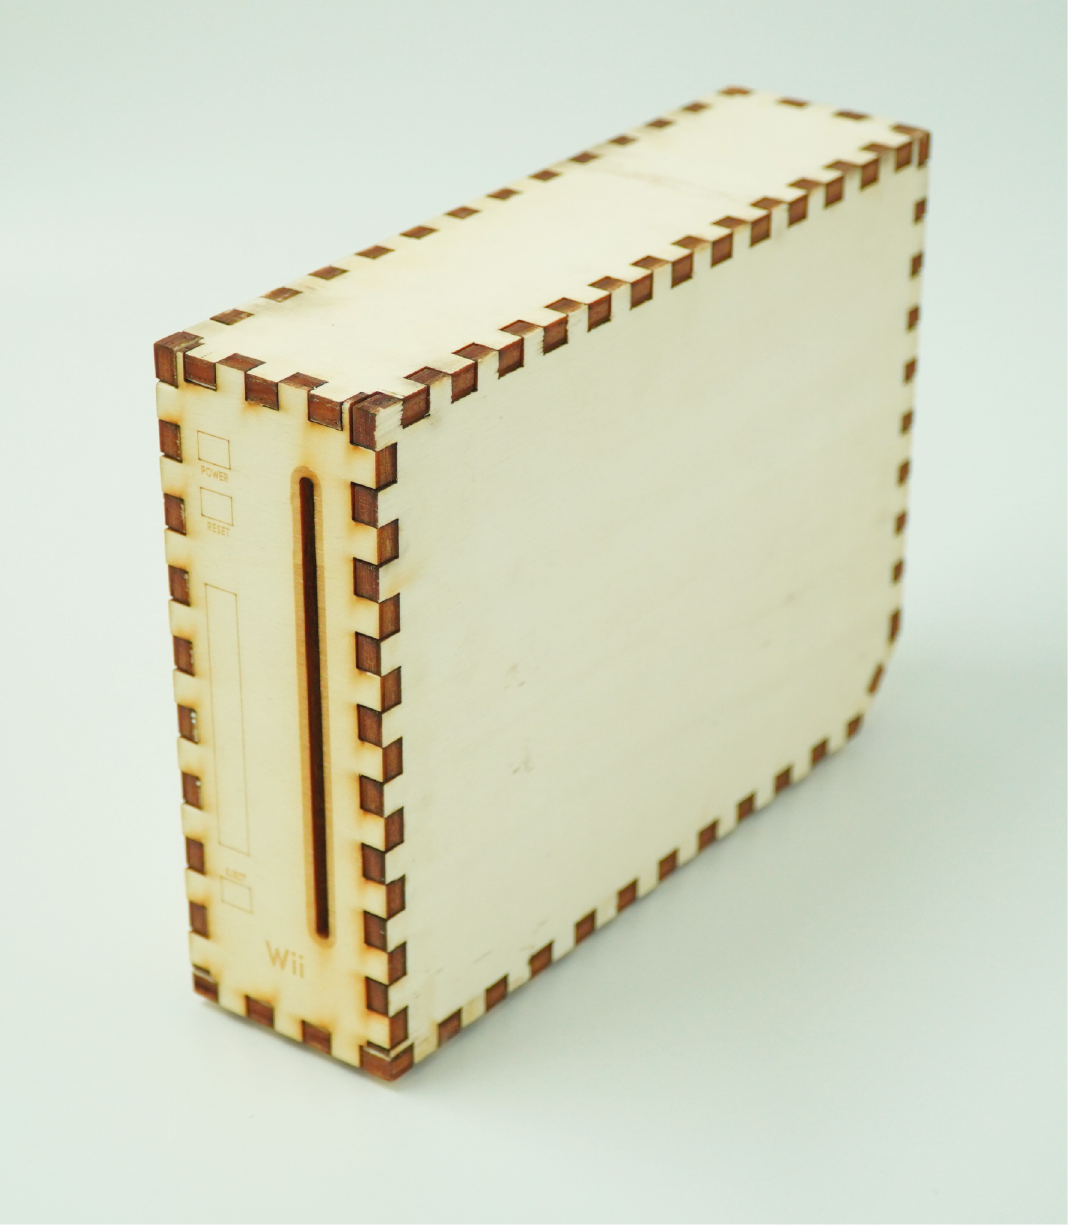
- Panels and Detailing: Flat components such as side panels and the base were created using laser cutting. This allowed for precise cuts and detailed engravings that matched the original console’s design.
- Assembly: Laser-cut parts were then assembled with the 3D printed components. This involved careful alignment and bonding to ensure a seamless integration.
Assembly and Finishing
The final assembly involved putting together all the fabricated parts:
- Joining Components: 3D printed and laser-cut parts were fitted together. Adhesives and screws were used where necessary to ensure a sturdy build.
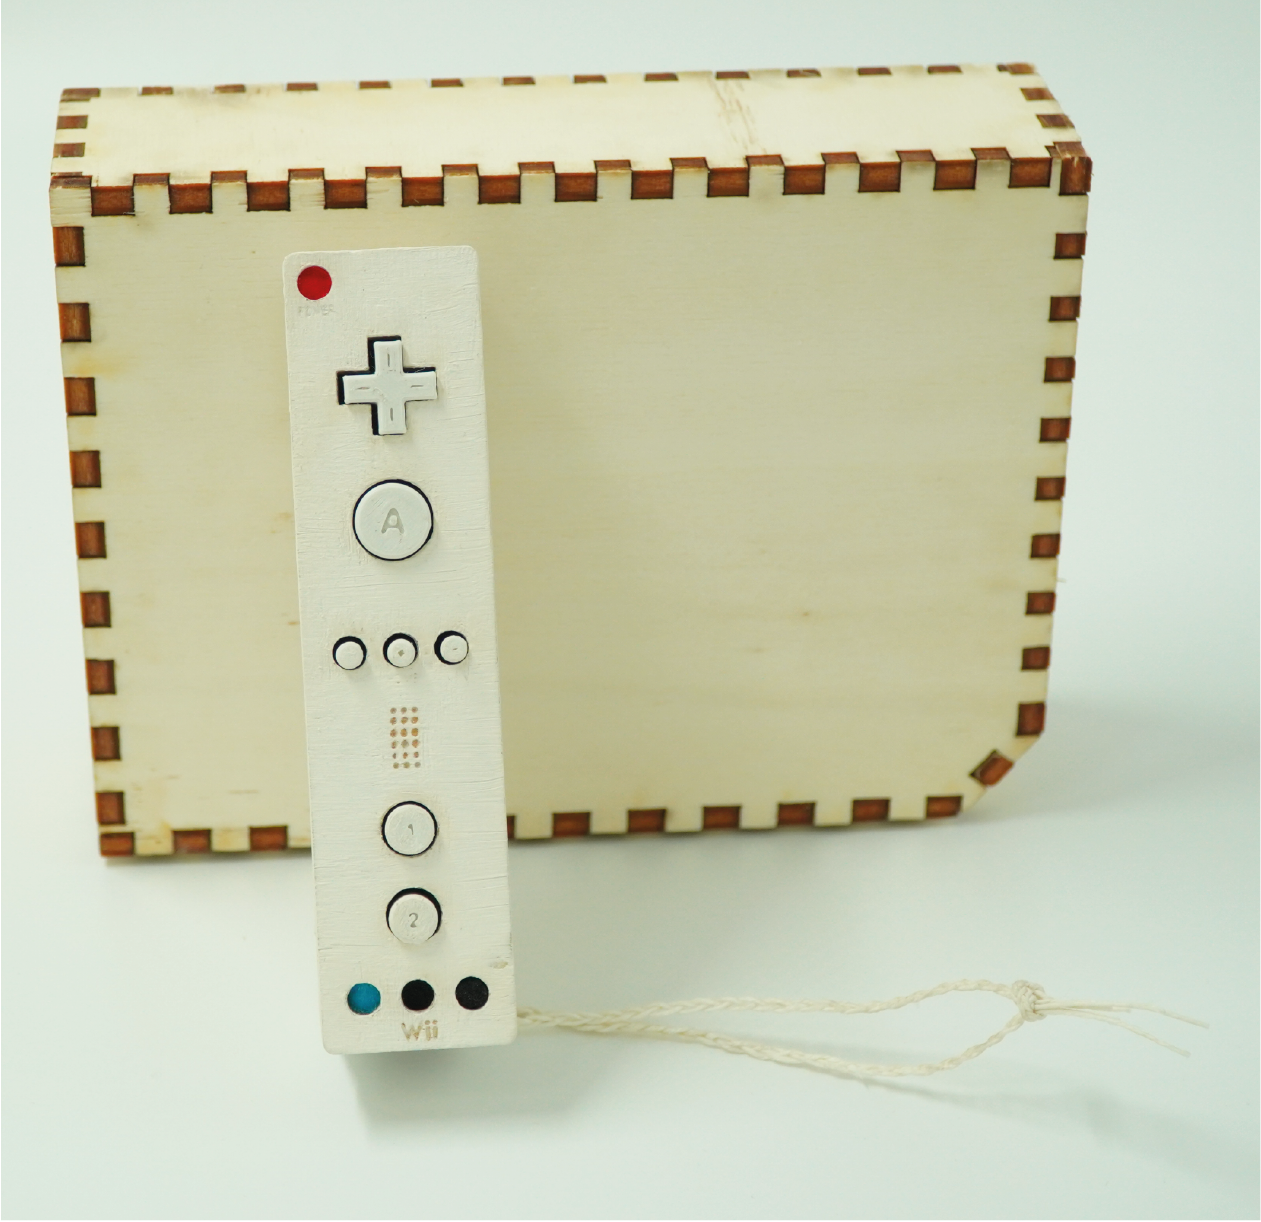
- Detailing: Additional details, such as decals and paint, were applied to match the Wii’s original aesthetic.
- Quality Check: The completed prototype was checked for accuracy in terms of dimensions and overall appearance compared to the original Nintendo Wii.
Conclusion
This project provided a comprehensive exercise in using Fusion 360 for 3D modeling and demonstrated our ability to translate digital designs into physical prototypes using modern fabrication techniques. The end result was a try at a detailed replica of the Nintendo Wii's hardware, showcasing our skills in both software and hands-on manufacturing processes.